Today I'll show you how to start working with Laravel - a modern PHP framework.
After reading this article you'll be able to:
- Install XAMPP
- Configure Virtual Hosts on Apache
- Create your first application in Laravel
- Run the application
- Start coding
As a first step I encourage you to visit Laravel.com to get some background knowledge about Laravel.

Laravel is a PHP framework which is build on top of the MVC pattern (MVC stands for Model View Controller).
You can find general explanation of MVC design pattern with some code examples written in Java here.
I assume that you've already installed XAMPP which has version for Linux, Windows and OS X.
Personally I'm using Windows in this tutorial but on each operating system it should work similarly.
You can get the installer of XAMPP from this page: https://www.apachefriends.org/pl/index.html.
When installer prompts you which options you want to install, you need to select Apache and you are free to skip the rest options as we don't need database and other features for now.
When Apache is up and running, then next step is to configure virtual host so that Apache can understand how to translate domain name to specific folder on your machine. In order to define virtual host open the file C:\xampp\apache\conf\extra\httpd-vhosts.conf, and append the following code to the end of the file:
DocumentRoot "C:\xampp\htdocs\blog\public"
ServerAdmin blog
Options Indexes FollowSymLinks
AllowOverride All
Require all granted
Now we have 2 options - we can buy a domain like mydomain.com and use A record to redirect to our server, or we can simulate similar behavior using hosts file. For development purposes I recommend the latter option, however when your app will go live, you should use domain because then it will be accessible to anyone in the internet. Hosts file ranhe is limitted to only your local machine.
Let's add some code at the end of file: C:\Windows\System32\drivers\etc\hosts
This is the code:
127.0.0.1 blog
This code instructs your local server to use localhost(127.0.0.1) when "blog" is requested in the web browser.
Now let's install laravel.
The prerequisite step is to install Composer. Composer will install Laravel framework and all dependend libraries on your machine. The installer for windows is available here.
When you sucessfully install Composer then you should install Laravel by running the following command from your command line:
composer global require "laravel/installer"
Once laravel is installed you're able to create a new laravel project. Go to C:\xampp\htdocs and run the command:
laravel new blog
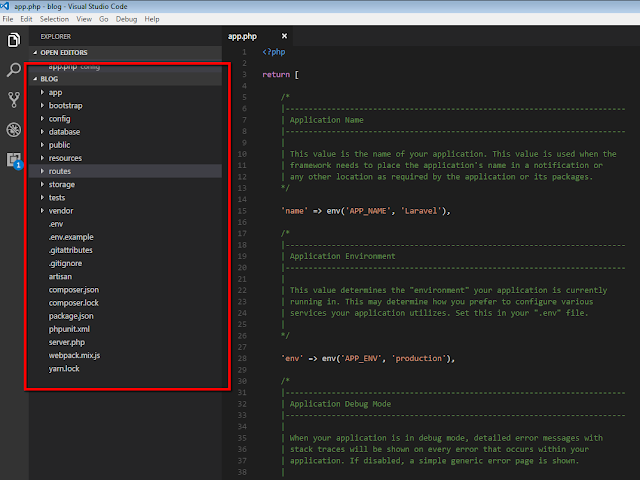
When you open the folder in Visual Studio Code, or different code editor you'll see the file structure. Take a moment and look at what's the folder structure and what's inside files.
The final step: Run web browser.

If you made all configuration steps coddectly, you should see a similar screen.
Next step - learn how Laravel works. This is an up-to-date documentation:
https://laravel.com/docs/5.4
After reading this article you'll be able to:
- Install XAMPP
- Configure Virtual Hosts on Apache
- Create your first application in Laravel
- Run the application
- Start coding
As a first step I encourage you to visit Laravel.com to get some background knowledge about Laravel.

Laravel is a PHP framework which is build on top of the MVC pattern (MVC stands for Model View Controller).
You can find general explanation of MVC design pattern with some code examples written in Java here.
I assume that you've already installed XAMPP which has version for Linux, Windows and OS X.
Personally I'm using Windows in this tutorial but on each operating system it should work similarly.
You can get the installer of XAMPP from this page: https://www.apachefriends.org/pl/index.html.
When installer prompts you which options you want to install, you need to select Apache and you are free to skip the rest options as we don't need database and other features for now.
When Apache is up and running, then next step is to configure virtual host so that Apache can understand how to translate domain name to specific folder on your machine. In order to define virtual host open the file C:\xampp\apache\conf\extra\httpd-vhosts.conf, and append the following code to the end of the file:
DocumentRoot "C:\xampp\htdocs\blog\public"
ServerAdmin blog
Options Indexes FollowSymLinks
AllowOverride All
Require all granted
Now we have 2 options - we can buy a domain like mydomain.com and use A record to redirect to our server, or we can simulate similar behavior using hosts file. For development purposes I recommend the latter option, however when your app will go live, you should use domain because then it will be accessible to anyone in the internet. Hosts file ranhe is limitted to only your local machine.
Let's add some code at the end of file: C:\Windows\System32\drivers\etc\hosts
This is the code:
127.0.0.1 blog
This code instructs your local server to use localhost(127.0.0.1) when "blog" is requested in the web browser.
Now let's install laravel.
The prerequisite step is to install Composer. Composer will install Laravel framework and all dependend libraries on your machine. The installer for windows is available here.
When you sucessfully install Composer then you should install Laravel by running the following command from your command line:
composer global require "laravel/installer"
Once laravel is installed you're able to create a new laravel project. Go to C:\xampp\htdocs and run the command:
laravel new blog
When you open the folder in Visual Studio Code, or different code editor you'll see the file structure. Take a moment and look at what's the folder structure and what's inside files.

The final step: Run web browser.

If you made all configuration steps coddectly, you should see a similar screen.
Next step - learn how Laravel works. This is an up-to-date documentation:
https://laravel.com/docs/5.4
Komentarze
Prześlij komentarz